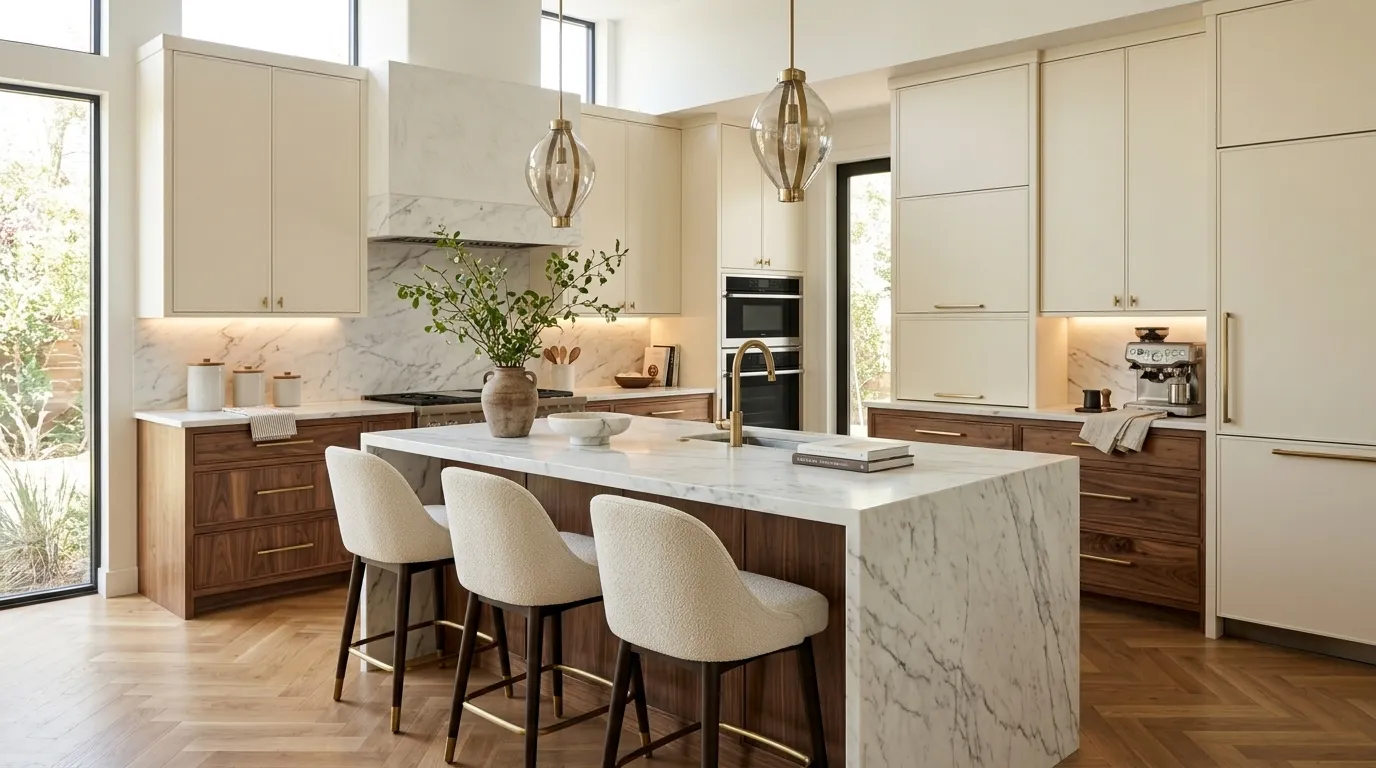
15 Luxury Kitchen Design Ideas for a High-End Look
A kitchen can feel luxurious without being filled with expensive finishes. Sometimes, the smallest details create the most beautiful difference.
These luxury kitchen designs show how to combine elegant materials, thoughtful lighting, and smart storage to create a high-end look that feels both stylish and practical. From dramatic waterfall islands and full-height stone backsplashes to fluted wood cabinets, mixed metal finishes, and hidden appliance storage, you’ll discover ideas for different tastes and kitchen layouts.
You don’t need to copy every detail to achieve a refined appearance. Start with the features that suit your space, budget, and daily routine. For example, upgrading cabinet hardware or adding under-cabinet lighting can refresh an existing kitchen, while a larger renovation might introduce custom cabinetry or integrated appliances. Compare materials, maintenance requirements, and installation costs before making decisions. The result can be a beautiful kitchen that looks thoughtfully designed and works comfortably for everyday life.
1. Waterfall Kitchen Island
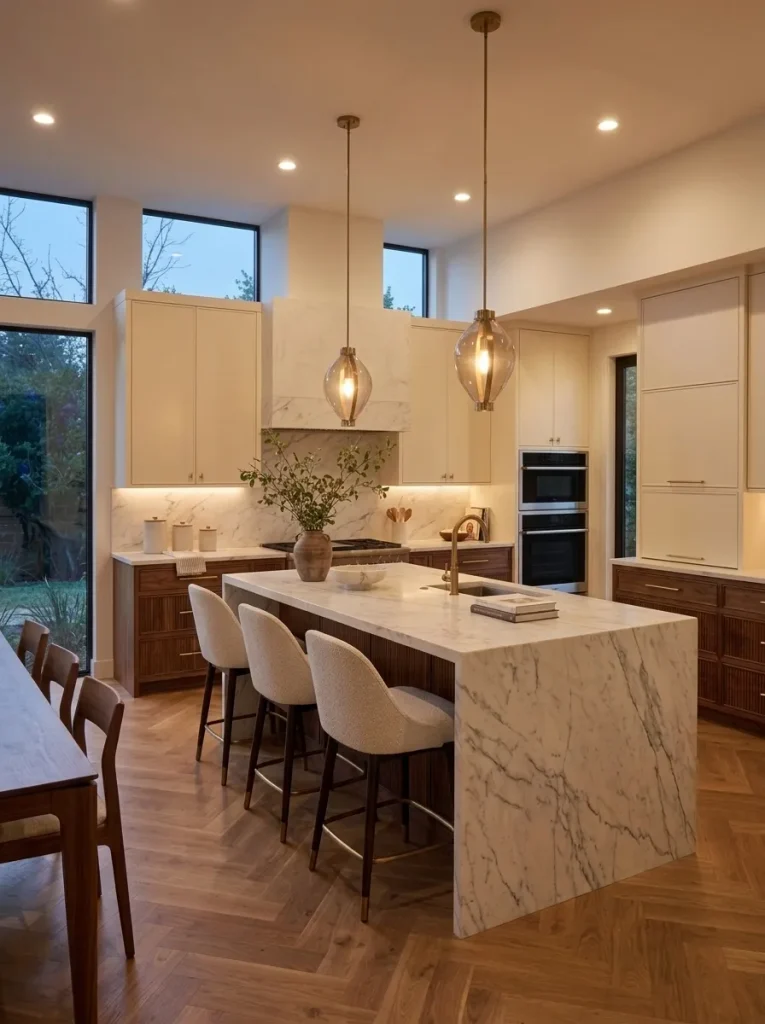
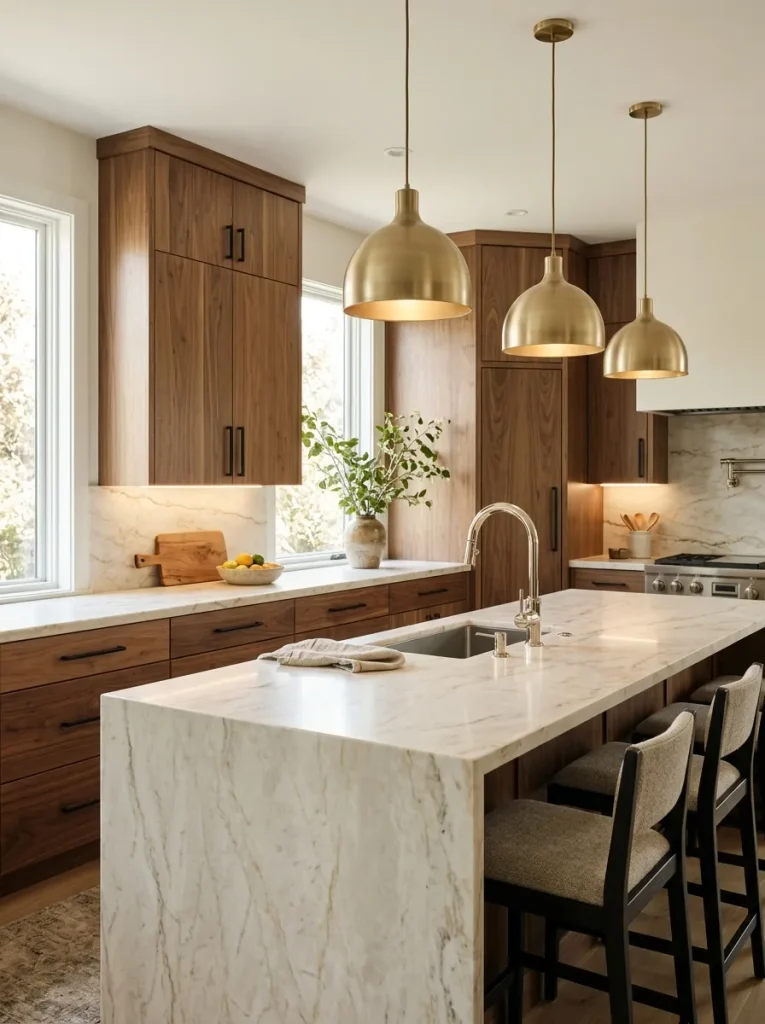
A waterfall island instantly gives a kitchen the refined appearance of a high-end designer space. The countertop stone continues down both sides to the floor, creating a clean, sculptural silhouette that draws attention the moment you enter the room.
For luxury kitchen designs, choose marble, quartz, or porcelain with veining that flows naturally across the edges. Pair the island with simple cabinetry and understated hardware to keep the overall look balanced. Even in an open-plan home, this statement feature can define the cooking area while offering extra seating, food preparation space, and storage.
2. Full-Height Stone Backsplash
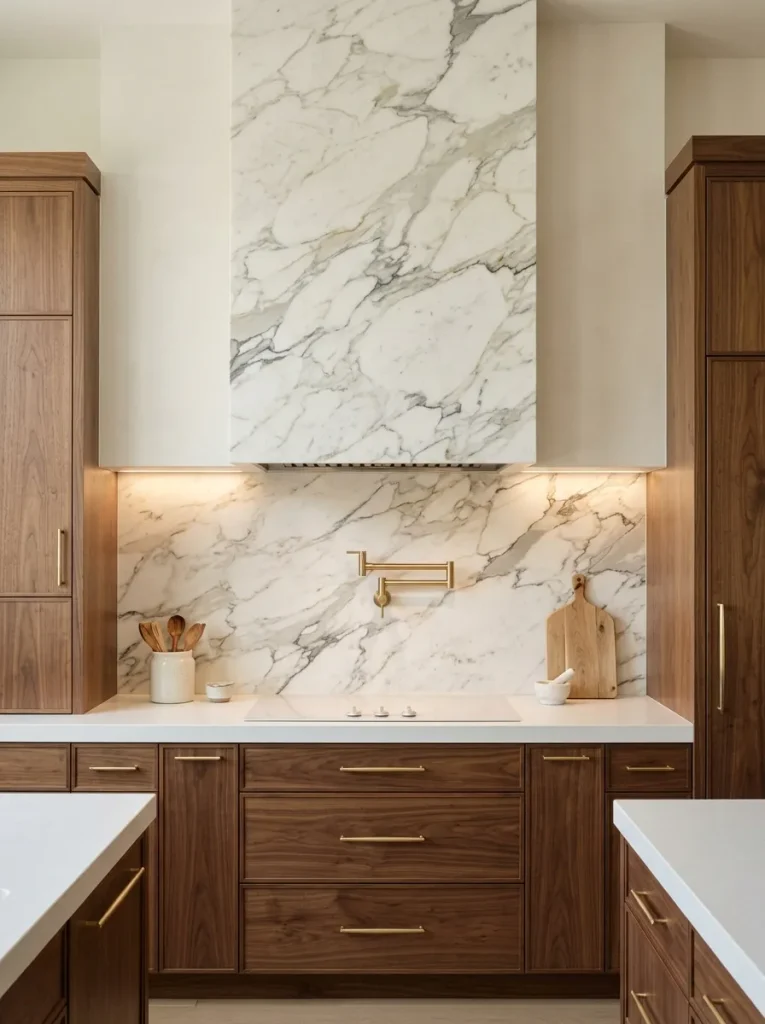
- Choose statement stone: Select marble, quartzite, or marble-look porcelain with distinctive veining for a refined focal point.
- Extend the surface: Carry the backsplash from the countertop toward the ceiling for a more continuous appearance.
- Coordinate finishes: Match the stone undertones with cabinet colors, flooring, and metal hardware.
- Keep styling minimal: Display only a few beautiful accessories so the natural pattern remains the main attraction.
- Plan maintenance: Check sealing requirements for natural stone and choose a finish suited to regular cooking cleanup.
A continuous stone backsplash makes the kitchen feel cohesive and thoughtfully designed. Large slabs reduce visible grout lines, creating a smooth backdrop that highlights the cabinetry and countertops. For easier maintenance, compare natural stone with engineered alternatives before choosing, especially behind cooking areas where grease and splashes are common.
3. Sculptural Pendant Lighting
Quick Tip:
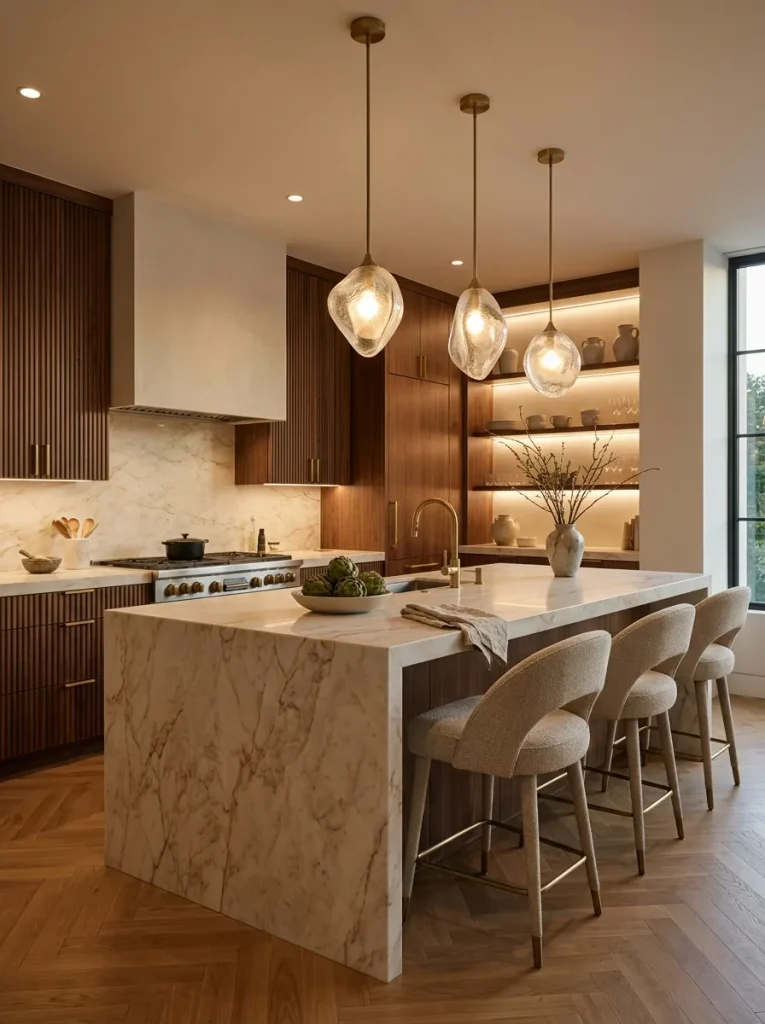
Hang pendants at a height that provides comfortable task lighting without blocking views across the island. Check the fixture manufacturer’s installation guidance, ceiling height, and recommended spacing before purchasing, especially when arranging multiple lights.
Statement lighting adds character while making an island feel like the centerpiece of the kitchen. Choose glass globes for an airy appearance, sculptural brass fixtures for warmth, or oversized fabric-inspired shades for a softer effect. Combine pendants with recessed or under-cabinet lighting so the kitchen remains practical during cooking and entertaining.
4. Fluted Wood Cabinetry
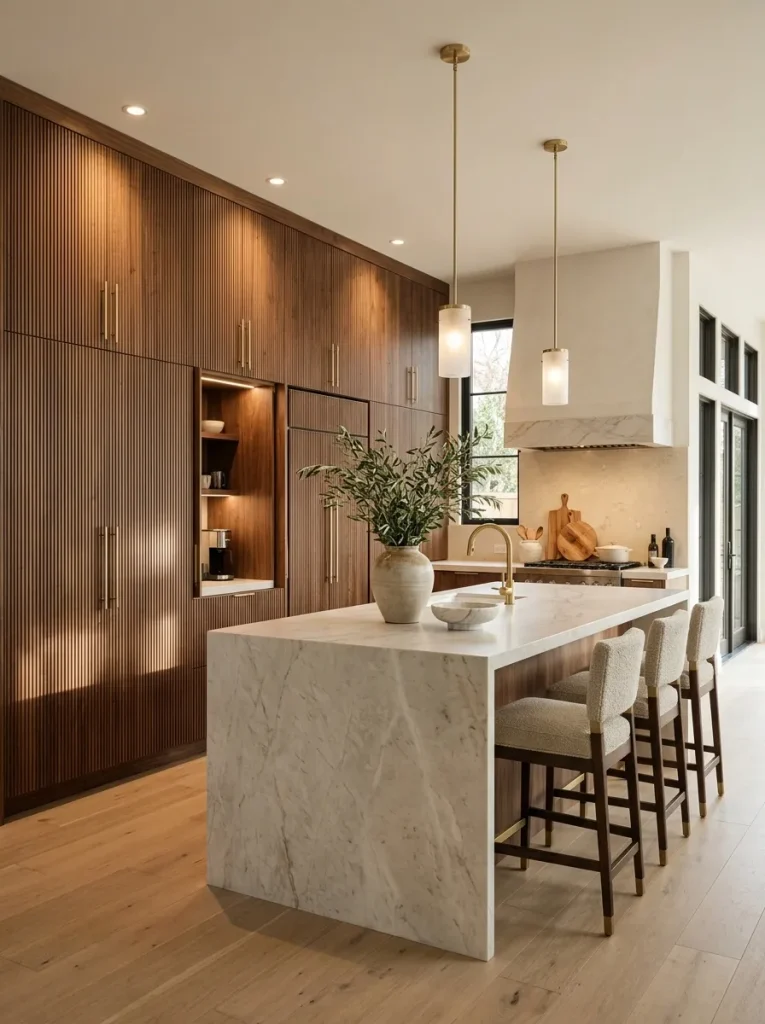
Flat cabinet doors can make an otherwise expensive kitchen feel plain, especially when the finishes lack contrast or texture. The room may look tidy but miss the architectural detail that gives designer kitchens their distinctive character.
AFTER
Fluted wood cabinetry introduces subtle depth through narrow vertical grooves and beautiful natural grain. The textured fronts create visual interest without relying on bold colors or excessive decoration.
For a refined finish, combine walnut or smoked oak cabinets with smooth stone countertops and simple metal handles. Use fluted details on the island or a single cabinet section if a full wall feels too busy. The contrast between textured wood and polished stone creates an intentional, upscale look.
5. Integrated Appliance Wall
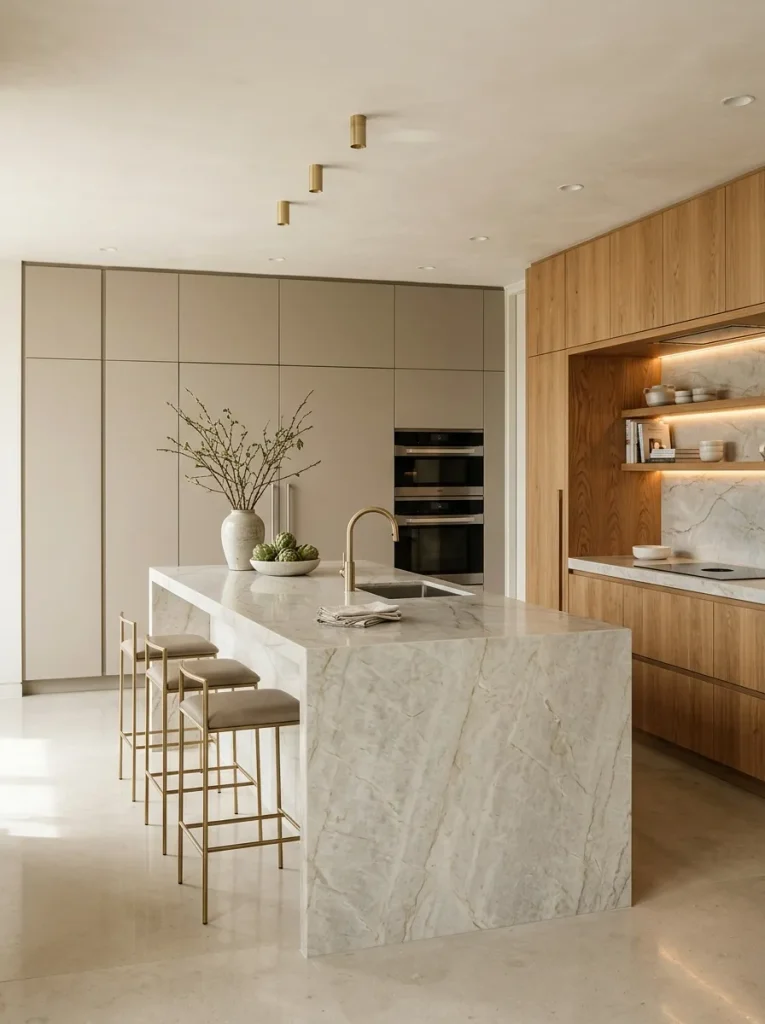
- Plan the appliance layout: Group ovens, a microwave, and refrigeration in a practical cabinet wall that suits your cooking routine.
- Choose coordinated fronts: Use matching cabinet panels on compatible integrated appliances for a continuous appearance.
- Add tall storage: Include pantry cabinets or deep drawers nearby to keep everyday equipment out of sight.
- Check clearances: Follow appliance specifications for ventilation, door movement, electrical connections, and installation access.
A dedicated appliance wall gives the kitchen a streamlined, built-in appearance while keeping essential equipment organized. Matching cabinet fronts reduce visual clutter, allowing statement surfaces and lighting to stand out. Before ordering cabinetry, confirm the exact appliance dimensions and ventilation needs with your installer to avoid costly adjustments later.
6. Layered Under-Cabinet Lighting
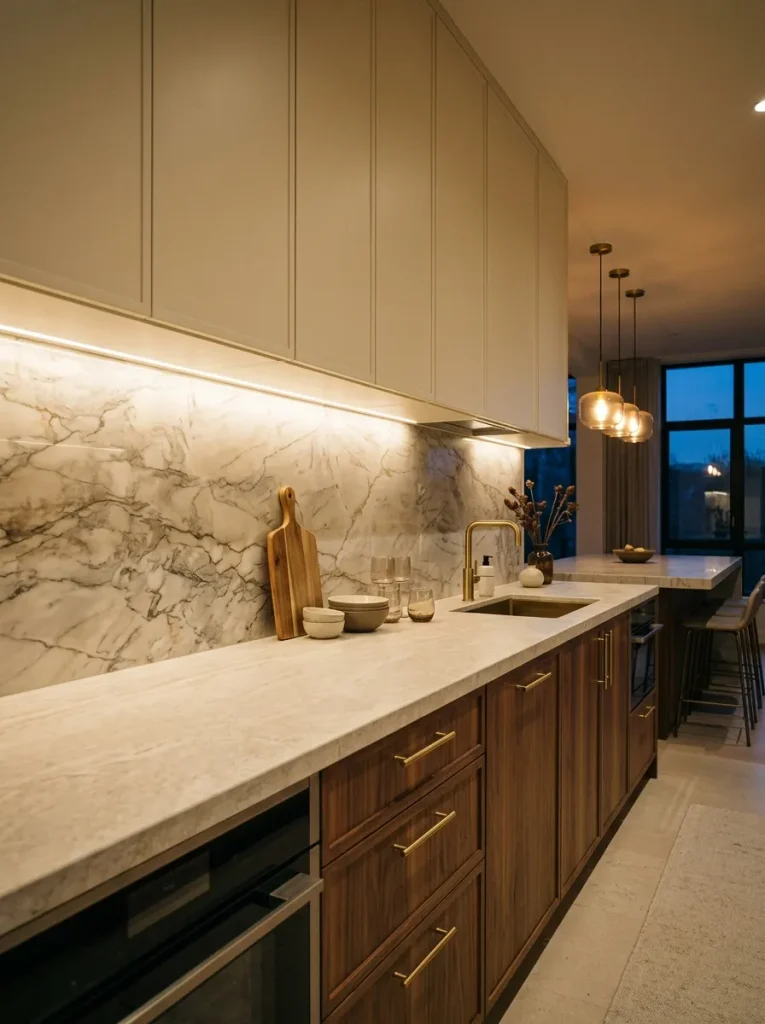
| Feature | Option A: Cool White Lighting | Option B: Warm White Lighting |
| Overall mood | Crisp and contemporary | Soft and inviting |
| Best pairing | Cool gray stone and bright white finishes | Walnut, beige, cream, and warm stone |
| Visual effect | Emphasizes clean, sharp details | Highlights natural textures and warmth |
| Ideal use | Task-focused preparation areas | Kitchens combining function and atmosphere |
Well-planned lighting makes beautiful materials more noticeable while improving visibility during food preparation. Choose LED strips with consistent color temperature and a diffuser to reduce harsh dots or glare on glossy surfaces. Warm white often suits natural wood and creamy finishes, while neutral white can work well with cooler palettes. Add a dimmer for flexible evening lighting.
7. Dramatic Two-Tone Cabinets
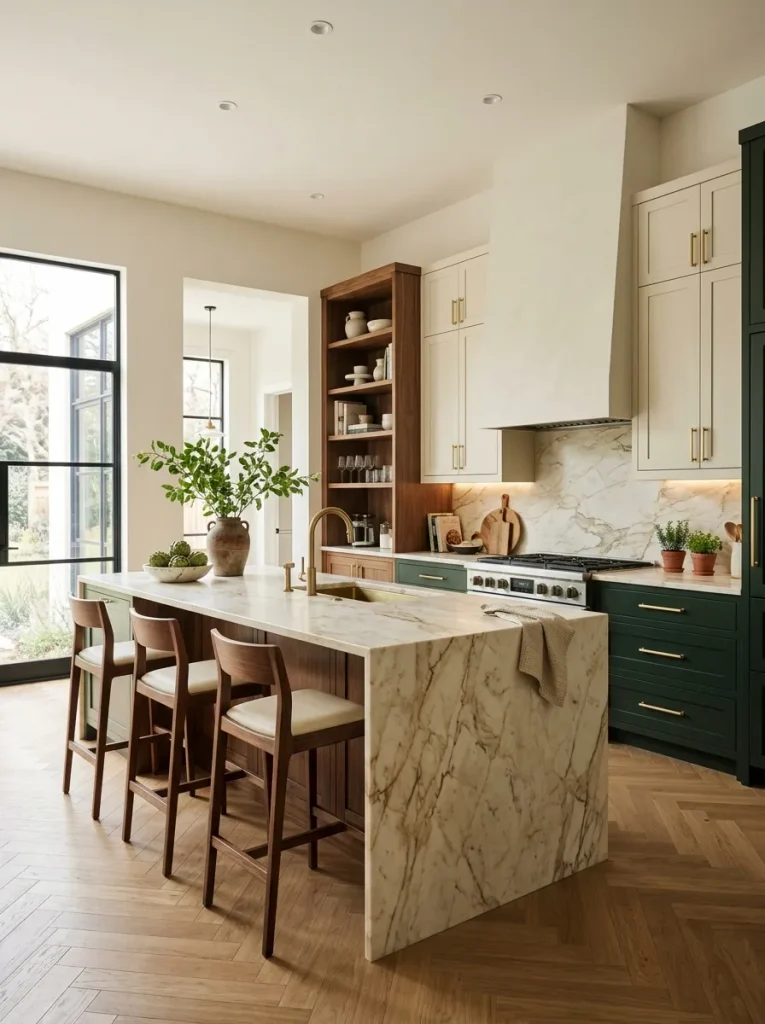
DO
- Pair deep green, navy, or charcoal lower cabinets with lighter upper cabinets.
- Match cabinet undertones with the countertop and flooring for a cohesive palette.
- Use consistent hardware finishes to connect both cabinet colors.
- Test paint samples in morning and evening light before making a final decision.
DON’T
- Don’t combine too many competing cabinet colors in one room.
- Don’t overlook how dark finishes affect a small kitchen.
- Don’t choose a cabinet color without checking it beside your countertop sample.
- Don’t use contrasting hardware finishes without a clear design plan.
Two-tone cabinetry adds dimension without requiring elaborate decoration. Darker lower cabinets ground the room, while light upper cabinets help the kitchen feel open and bright. For a designer finish, repeat one of the cabinet colors in a pendant, bar stool, or accessory, keeping the remaining surfaces relatively simple.
8. Hidden Walk-In Pantry
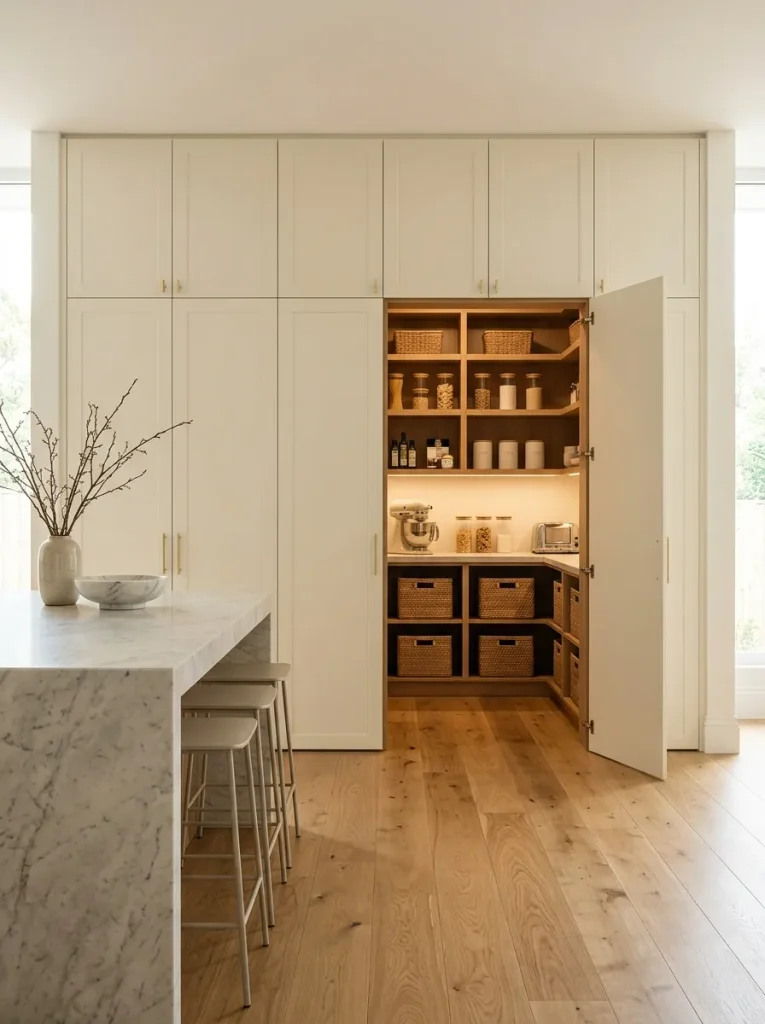
Cost: Moderate to high, depending on room size and cabinetry.
Best For: Homes with space for a separate storage area.
Design Priority: Accessible shelves, clear countertops, and practical appliance storage.
Visual Result: A calmer kitchen with fewer items on display.
A walk-in pantry helps keep food supplies, countertop appliances, and everyday packaging out of sight. Group baking ingredients together, place frequently used items on reachable shelves, and reserve lower storage for heavier containers. Even a compact pantry can support a high-end appearance when its shelves, lighting, and storage containers are planned around your daily routine.
9. Warm Natural Stone
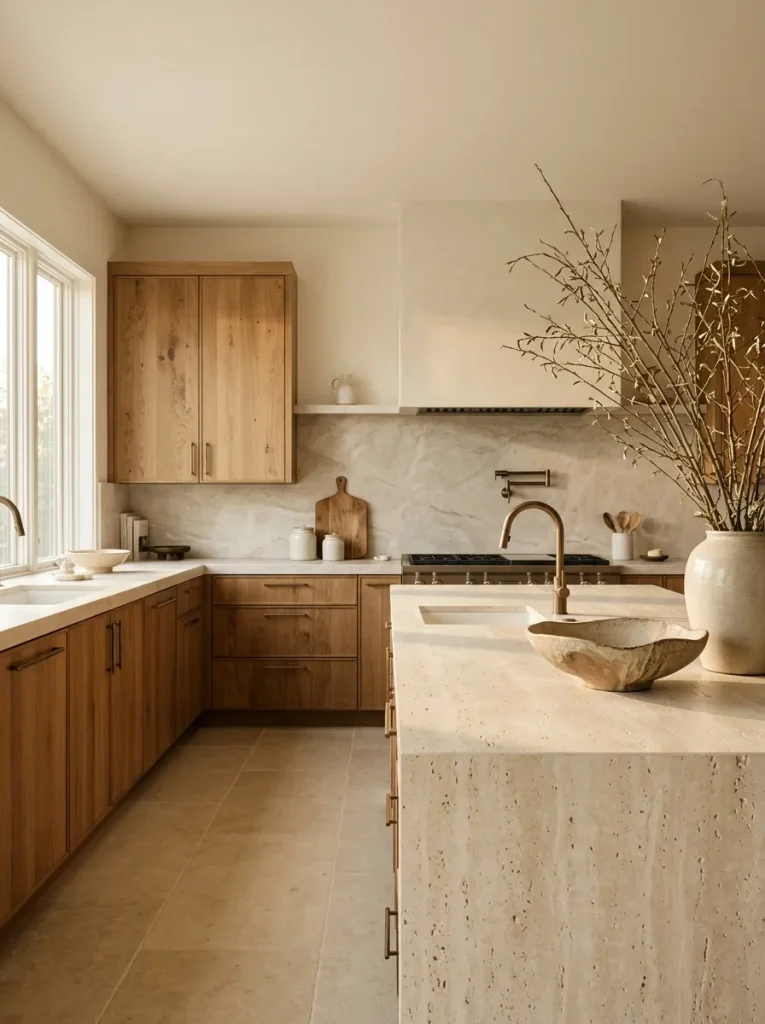
Natural stone brings a sense of depth that printed finishes often struggle to reproduce. Travertine, quartzite, and carefully selected marble each offer distinctive veining, subtle color changes, and tactile character that make the kitchen feel more individual.
I’ve noticed that stone looks most striking when it has room to stand out. Pair a richly patterned slab with quiet cabinetry, or choose softly textured beige stone for a warm, understated interior. Before selecting a material, check porosity, sealing needs, stain resistance, and maintenance requirements, especially for busy family kitchens.
10. Concealed Range Hood
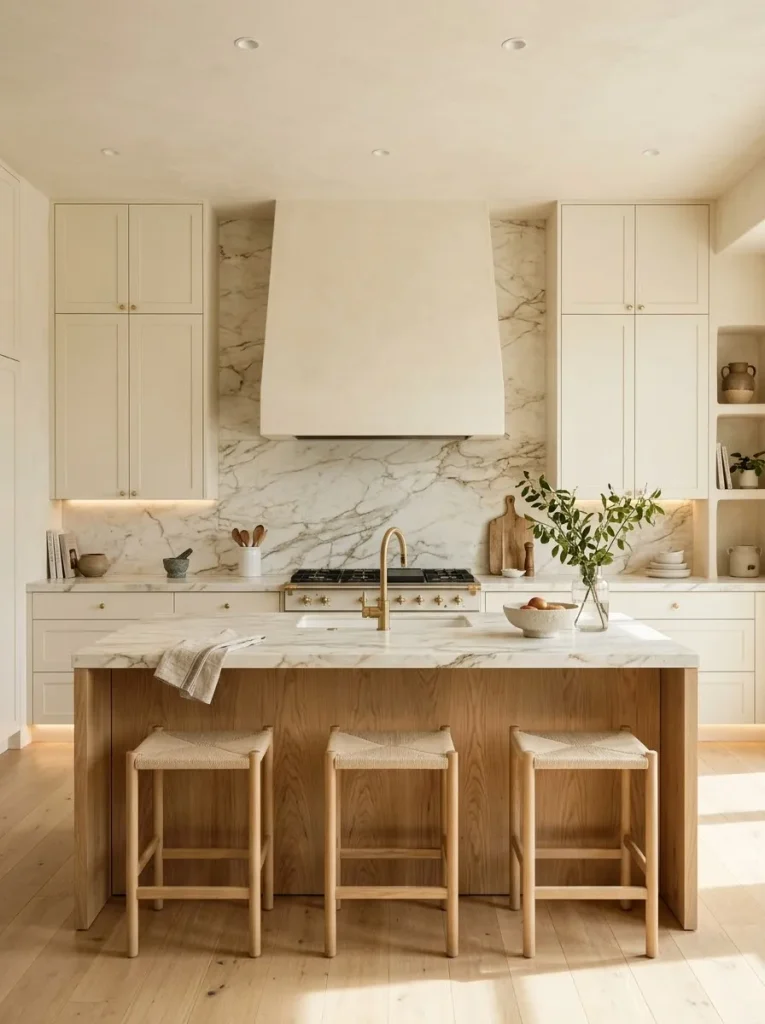
- Match the wall finish: Use plaster, painted cabinetry, or stone cladding that coordinates with the surrounding surfaces.
- Keep proportions balanced: Size the hood to suit the cooktop and the scale of the cabinetry.
- Choose practical materials: Select finishes that can tolerate the heat, grease, and cleaning demands of cooking.
- Plan ventilation early: Confirm the hood’s extraction requirements and duct route before finalizing cabinet dimensions.
- Add subtle details: Simple trim or a softly curved shape can make the hood feel custom-designed.
A concealed range hood creates a calmer visual line by reducing the appearance of bulky kitchen equipment. The result feels architectural, especially when paired with continuous cabinetry and a beautiful backsplash. Make sure appearance never compromises ventilation, access, or fire safety, and have the hood installed according to the manufacturer’s specifications.
11. Glass-Front Display Cabinets
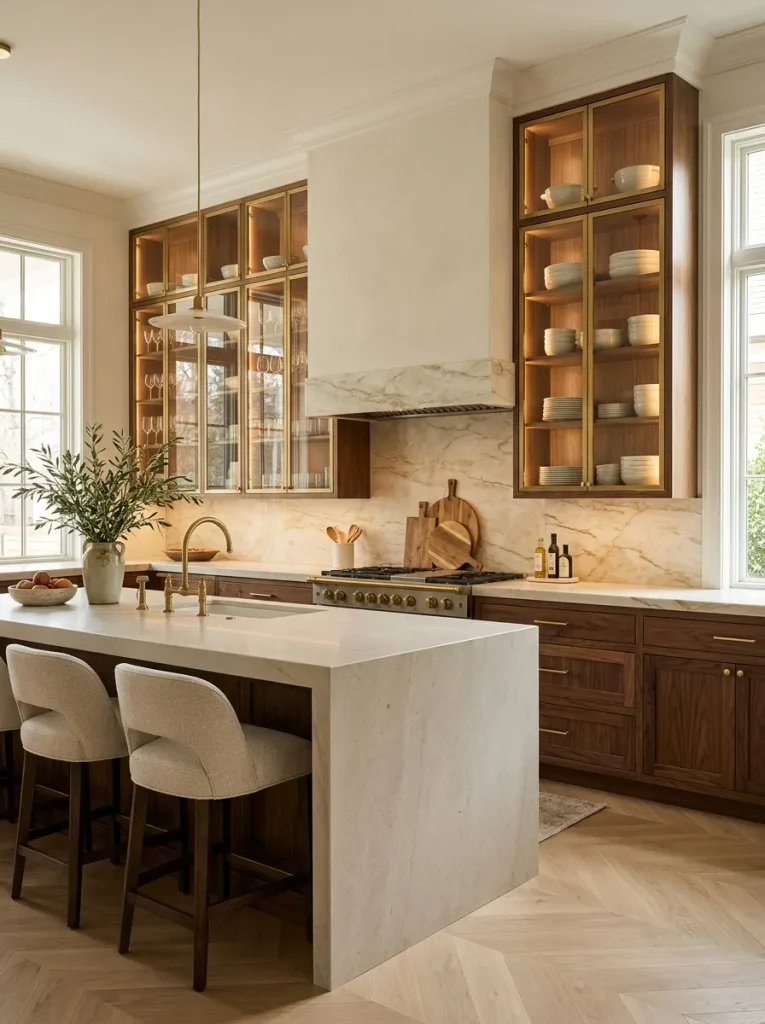
Quick Tip:
Arrange glass-front cabinets by color and item type instead of filling every shelf with unrelated objects. Install gentle interior lighting if desired, and leave some breathing room around each grouping so the display looks intentional rather than crowded.
Glass-front cabinetry adds depth and allows favorite dishes, glassware, or decorative ceramics to become part of the kitchen design. Choose clear glass for a crisp appearance or reeded glass for a softer, more forgiving display. Keep daily essentials within easy reach and store mismatched packaging behind solid doors to maintain a polished look.
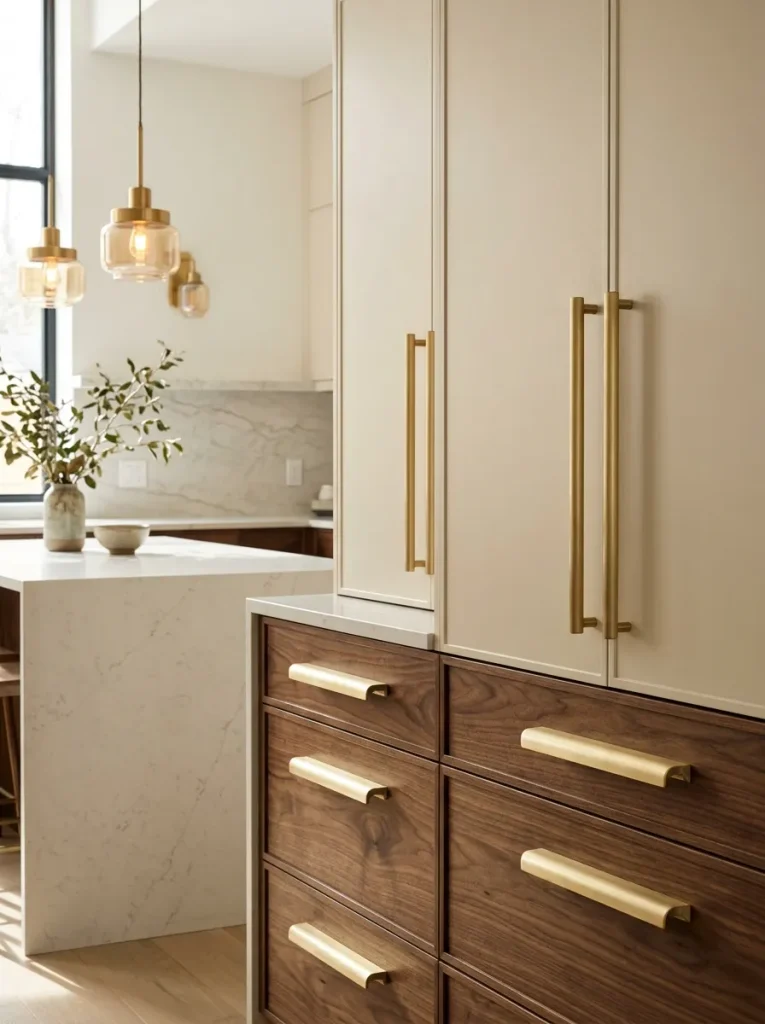
12. Oversized Cabinet Hardware
BEFORE
Small, mismatched cabinet handles can make beautiful cabinetry feel less considered. The kitchen may have quality materials, yet the hardware fails to connect the cabinets with the lighting, faucet, or other finishes.
AFTER
Oversized pulls create stronger visual lines and give drawers and cupboard doors a more custom appearance. A consistent finish helps different cabinet styles feel connected, while longer handles can be easier to grip on wide drawers.
Before replacing hardware, measure the existing hole spacing and confirm the new pulls will fit. For doors without matching holes, plan the placement carefully to avoid unnecessary drilling. Brushed brass adds warmth, matte black creates contrast, and polished nickel suits cooler palettes. Choose proportions that complement the cabinet size rather than overpowering it.
13. Custom Drawer Storage
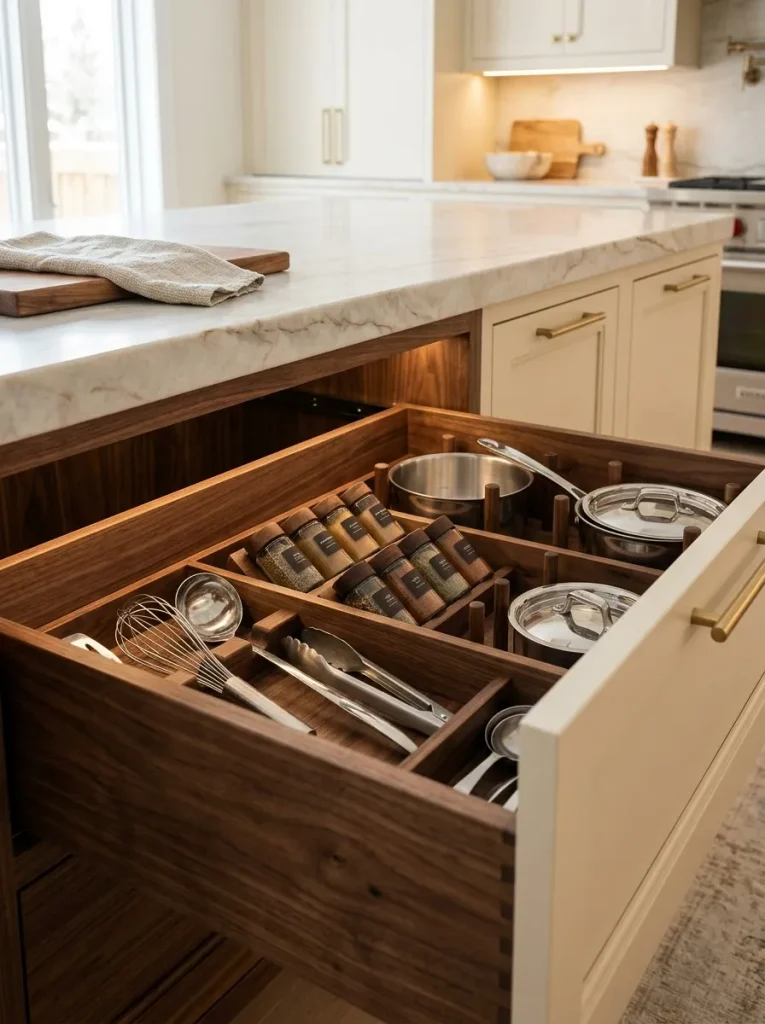
- Sort your essentials: Group cooking utensils, cutlery, spices, and food preparation tools according to how you use them.
- Measure each drawer: Record the internal width, depth, and height before choosing organizers.
- Choose quality dividers: Select adjustable wooden inserts or fitted organizers that keep items in place.
- Reserve accessible storage: Place everyday tools near the cooktop and preparation areas.
- Keep a little space free: Leave room for new utensils instead of packing every drawer tightly.
Well-planned storage makes a beautiful kitchen more enjoyable to use because countertops stay clear and essential tools remain easy to find. Wooden dividers add a refined detail inside drawers, while adjustable inserts offer flexibility as your needs change. Choose moisture-resistant materials and organizers that can be removed for straightforward cleaning.
14. Mixed Metal Finishes
| Feature | Option A: Single Metal Finish | Option B: Mixed Metal Finishes |
| Overall look | Consistent and understated | Layered and designer-inspired |
| Styling approach | Repeat one finish throughout | Combine two or three complementary finishes |
| Best pairing | Minimalist and classic kitchens | Transitional and contemporary interiors |
| Main consideration | Match undertones and sheen | Repeat each finish intentionally |
Mixing metals adds depth and makes a kitchen feel more personalized without introducing extra colors. For a coordinated result, choose one dominant finish for cabinet hardware and use a second finish for lighting or the faucet. Repeat smaller accents where possible, and compare physical samples under your kitchen lighting before committing to the combination.
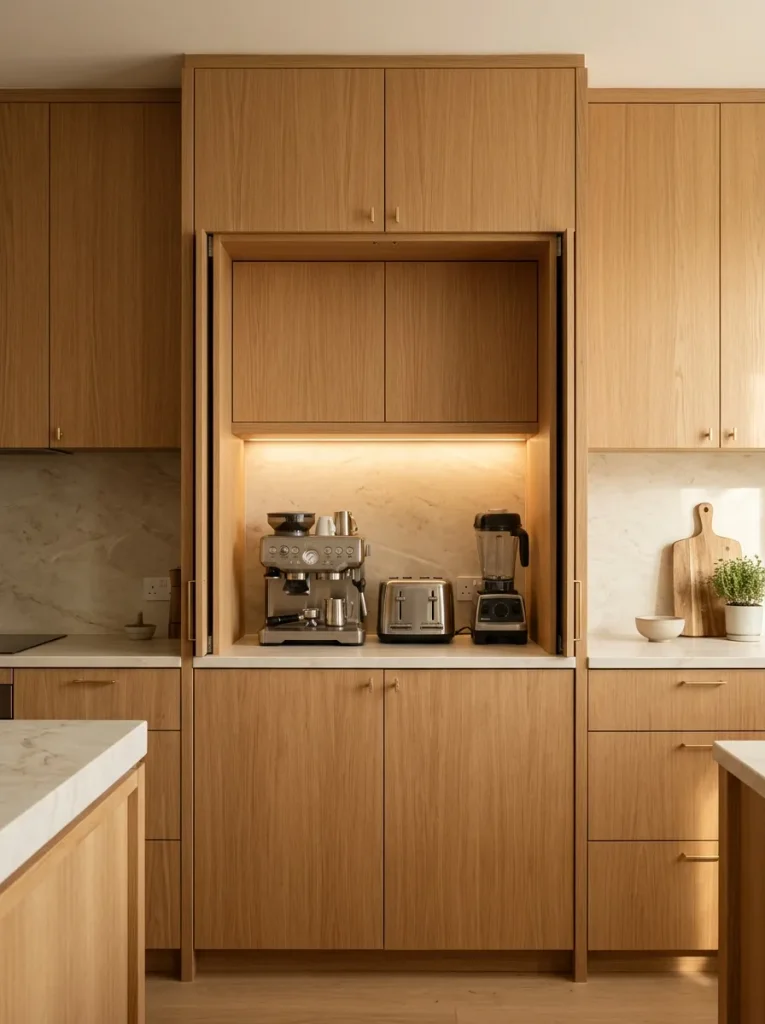
15. Hidden Appliance Garages
DO
- Design an appliance garage around the appliances you use most often.
- Include accessible outlets and suitable ventilation where required by the appliance manufacturer.
- Choose doors that open fully without blocking nearby work areas.
- Match the exterior cabinetry to the rest of the kitchen for a built-in appearance.
DON’T
- Don’t store hot appliances inside a closed cabinet before they have cooled.
- Don’t hide appliances that require ventilation in an unsuitable enclosure.
- Don’t place electrical outlets where spills can easily reach them.
- Don’t sacrifice essential preparation space for oversized storage.
An appliance garage keeps coffee machines, blenders, and toasters organized while allowing the main countertop to remain visually calm. It works especially well in kitchens where several small appliances compete for space. Plan the cabinet depth, door mechanism, electrical access, and ventilation carefully so the storage solution remains safe and convenient for everyday use.
Conclusion
Creating a high-end kitchen starts with choosing details that work together. Beautiful stone surfaces, warm cabinetry, layered lighting, and clever storage can help your kitchen feel polished without unnecessary decoration.
The best luxury kitchen designs balance visual appeal with everyday function. Choose one feature that inspires you, whether it’s a statement island, elegant pendant lighting, or organized custom drawers, and build your design around it. I’ve noticed that a consistent color palette and carefully chosen finishes can make a space feel more intentional. Save this article on Pinterest for future inspiration, try an idea that suits your home, and share it with someone planning a kitchen makeover. Your dream kitchen starts with one thoughtful choice!